We are going to be using a piece of software called Inkscape.
Inkscape is a open source Vector Drawing Package available for free at http://www.inkscape.org
It has a lot of nice features comparable to other vector drawing software like Adobe Illustrator and Corel. While the commercial packages have many more nifty features Inkscape has everything we need for mapping and it is free!
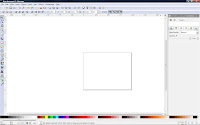
Download the latest version and install it. When you run the software you will see the following screen.
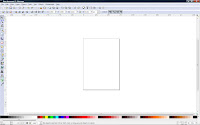
First you do is click on the menu File then Save. Give it a name like Document Template or Sample Map.
Now we need to setup the basics.
Click on the menu File->Document Properties
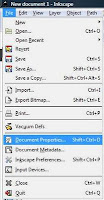
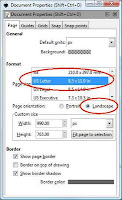
The following dialog will appear.
Change the page size to US Letter and the Page Orientation to Landscape. After you are done click the Red X in the upper right corner.
Next click on the menu Layer->Layer... (it's all the way at the bottom)
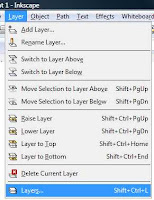
You will see a dialog appear on the right side of the screen. This is called a docker and it docks to one side or the other. Drag it out of there by dragging the title bar. Then goto the lower right corner and drag it until it fill 2/3 of your screen from top to bottom.
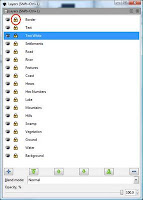
You will see this. Now use the blue + 'plus' button to add a layout, name it Background. This several more times adding the following layers
Water, Ground, Vegetation, Swamp, Hills, Mountains, Lake, Hex Numbers, Hexes, Coast, Features, River, Road, Settlements, Text White, Text, Border.
After you add the layers scroll through what you added and click the lock symbol. It is circled in red below. The lock symbol locks that layer so that you can't draw on it. This prevents drawing on the wrong layer.
In the cut and paste days with glue and paper layers are like films of acetate. You build up your map or presentation by starting with a bottom sheet of acetate layering each successive sheet on top until the drawing was finished.
Then click the Border layer and click the lock system to unlock it. Make sure it is highlighted in blue. Then click the Red X in the upper right corner.

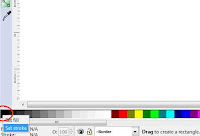
In the lower left corner there are two fields call Fill and Stroke. Fill control what color is the inside of a shape, Stroke controls the color of the border. For now we want the stroke black and the fill set to n/a
First click the rectangle tool on the left side of the screen. Then go down to the lower left and right click fill. On the menu make sure you click Remove Fill at the bottom. Then move up to the the color strip and right click black. On the menu click set stroke.
Next use the rectangle tool and draw a rectangle anywhere on the page. You click and then drag to form the rectangle.
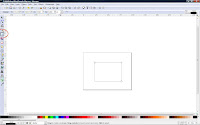
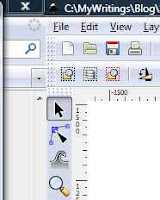
Next click the arrow tool at the top of the tool strip on the left side of the screen. Click on the rectangle. You see selection handle appear around the rectangle.
Finally look at the second toolbar down from the top.
You will see four fields in the middle of the toolbar. This will show the dimensions of the rectangle you just drew. Go to the last field which is a drop down list. Click the down arrow and pick in (inches).
Then for the other four fields make X 0 (zero). Y 0 ,W (width) 11, H (Height) 8.5
See below how this looks
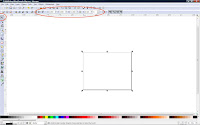
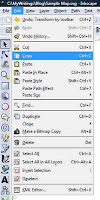
Then click on the menu Edit->Copy. Note you not see any visible change here.
Make sure you are still on the Arrow tool on the left side of the screen. Click anywhere OUTSIDE of the rectangle. You will see the eight selection handle disappear.
Then click the Menu Edit->Paste

You will see something like below.
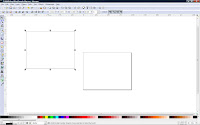
Next change the fields for this rectangle as follows
X .25, Y .25, W (width) 10.5, H (height) 8.0

Then move the cursor well outside of the two rectangles. Hold down the left mouse button while the cursor is up and to the left of the two rectangles and then DRAG the mouse. As you drag you will see a dashed box appear. This is a selection box. Drag it until it surrounds both rectangles and release the left mouse button.
The bottom bar will report that you will have two objects selected.

If this is the case then click the menu Path->Difference. You will not see any visible changes other than the message at the bottom will change to Path (8 nodes) in layer BORDER.
What this does make the smaller rectangle punch out a hole in the larger rectangle. This means any objects that are layered below the border will show through the punched out area.

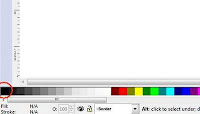
Click on black in the color strip at the bottom of the screen.
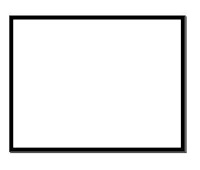
You will see the following
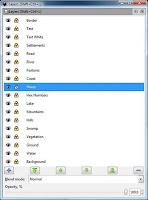
Now click on the menu Layer->Layers...
The following appears.
First Lock Borders
Next click on Hexes and it will be highlighted in blue.
Unlock Hexes by clicking the lock/unlock symbol next to the name.
Now save the file.
You are ready for Part 2.
What we just did is draw a 1/4 inch border around our drawing. For most printers or projects there is some amount of spaces that you can't print on. Usually it is about 1/4. By defining this border you know where the bounds are. Also it gives teh resulting map a pleasant looking boundary. As you become more proficent you may want to experiment with fancier or thick borders.
You can download the finished drawing from here http://www.ibiblio.org/mscorbit/map/Sample Map Step.svg
Note that you will have to right click the link and on the menu click Save Target As. This is because many web browser can display the svg format that Inkscape uses.
Part II
6 comments:
This is gold, Rob! Can't wait for the next installment!
Really nice series of articles.. i know now that i'll love it :D
I absolutely love Inkscape. A while ago I also wrote a tutorial for it.
Still working for me today--thanks Rob, gave me an excellent start!
Post a Comment