First bring up the map you created from the first part of this tutorial or download Sample Map 1
Remember to right click and use Save Link As.. This is an SVG files which most browsers can display.
Once you have opened the file with Inkscape then click on the menu Layers->Layers... The following dialog will appear.
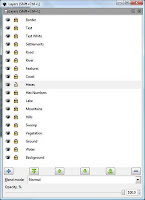
Make sure that Hexes is unlocked AND highlighted in blue.
Now click on the menu File->Document Properties
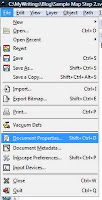
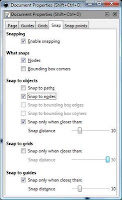
A dialog will appear.
Click on the Snap tab and make sure it looks like below. You will likely need to click on Snap to Nodes (it is in the middle of the dialog).
Then click the red X in the upper right corner.
Then click on the Stars and Polygon tool on the left side of the screen.
In the upper left corner, click on the star and then the polygon. There is some odd issues with Inkscape that causes you to draw a star despite having the polygon selected. This will fix that issue.
Then make sure you change the corners to 6.
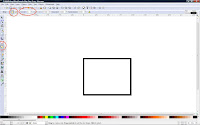
Now draw a single hex.
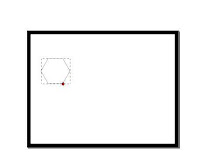
I can't really show this so you will have bear with me.
1) Click and HOLD DOWN the left mouse button anywhere where it is white.
2) With the opposite hand hold down the control key.
3) Drag the mouse you will see the hex increasing in size and rotating.
4) Because you are holding down the control key it will only rotate in 15 degree increments.
Rotate it so the top and bottom are flat. The size is not an issue just stop when you have the top and bottom flat.
5) Release the left mouse button .
You have your first hex.
Now you will have to decide how many hexes you want from top to bottom. For this tutorial I am picking ten hexes. The actual number will depend on your scale and the region you are making up.
Now select the hex by clicking on it.
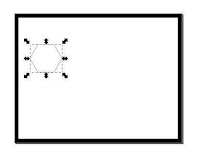
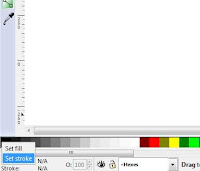
Go down to the lower left corner and right click the black color. Click Set Stroke. This will make the border of the hex black. Later one we may want to change it to a shade of gray to lower the contrast with the coastline and other features of the map.
Then click on the menu Edit->Copy
Then click on the menu Edit->Paste
You will see a second hex appear.
Drag it underneath the first hex. Drag it so that one of the upper corner is near one of the first hex's lower corners. At some point when they are close enough you will see the second hex snap into place along the bottom.
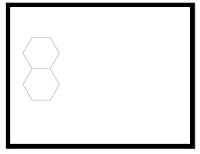
Release the mouse button.
Congratulations you have your second hex nicely aligned with the first one.
Do this until you have a column of ten hexes.
Make sure you have the arrow tool (the topmost tool) selected.
Draw a selection box around the column. Then click the menu Object->Group. This will unite all ten hexes into a single group.
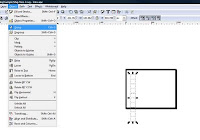
Then click the menu Edit->Copy

Then click Edit->Paste.
Drag the column so that it dovetails with the first column. The even columns will be a half hex lower and the odd Columns the same height as the first column. You want about 15 columns like below.
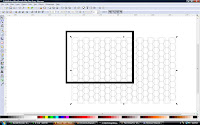
Using the Arrow Tool select all the hexes.
Click on Object->Group. This will unite all the columns until one large hex grid.
Now drag the grid so that the upper left corner is near the inside upper left corner of the border.
Zoom in using the View Menu or by holding down the Control Key and moving your mouse wheel.
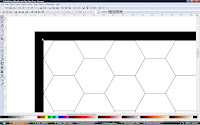
When you are zoomed in. Drag the hex grid so that the top edge and the left corner of the upper left hex touches the border perfectly. This is shown below.
Then zoom out until you can see everything.
You will notice that your hexgrid has eight selection handles. Grab the lower right one with your mouse. Hold down the control key and drag the corner. You want to fit rows as close as you can to the top and bottom inside edges of the border. As well as having the right corner of a column of hexes touching the inside right edge of the border. If you have done it correctly the result will be as below.
The control key keeps the proportions of the resizing objects even so your hexes don't get distorted.
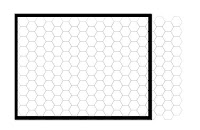
It is ok if the top and bottom edges of the hex columns don't quite touch. We will fix that in a later step. But you will see that we have a lot of extra columns and a few extra on the bottom.
You want to click the menu Object->Ungroup about three or four times so that we are ungroup down to the individual hexes.
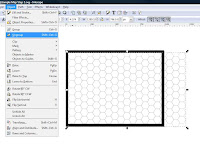
Start selecting any hexes that lay outside of the border and delete them.
The result should be this. Save your map and we are done with tutorial #2.
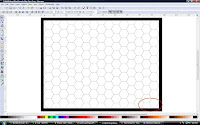
It is not easy to get the right proportions for a hex grid so always include extra columns and rows to have maximum flexibility.
Invariably you will have small gaps between the edges of the hex grid and the border. We can fix this and will do so in the next tutorial. After we are getting into the actual drawing of the map.
The final result can be downloaded from here.
Part 3
1 comment:
Using Inkscape's Create Tiled Clones command can make this less labour-intensive and prone to errors.
The basic technique I got from here.
Modified, this is what I do:
1. Create a hex as in your tutorial, positioned above and to the left of the top-left corner of the page/border. (It's outside to make sure the clones fill the desired area.)
2. With the hex selected, go to Edit -> Clone -> Create Tiled Clones.
3. Click on the Shift tab in the dialogue that comes up. Set "Shift X per column" to -25% and "Shift Y per column" to -50%. Now set "Rows, column" to 10x10 and click Create.
4. This will give a mess of hexes across the page in a falling-over diamond shape, with a lot of hexes outside the printable area. If the hexes don't fill the page, click "Remove" in the clone dialogue and increase the number of rows and columns. Click Create again to see if the adjustment was enough. Repeat until the area is filled with hexes.
5. Use the select tool to draw a box around all the hexes outside your desired area and delete them, as desired. They're outside the printable/exportable area, so this is just cosmetic.
6. Group them and send them to the background or the foreground, as desired, then lock that layer.
Post a Comment